Difference between revisions of "Accessing Linux From Windows"
Rboatright (talk | contribs) (dep) |
(deprecated template, remove redundant heading) |
||
| Line 1: | Line 1: | ||
| − | + | {{template:deprecated | | |
| − | + | Please use the much simpler method at [[Portal:Accessing_Linux|Accessing Linux]] instead. | |
| − | + | }} | |
| − | |||
| − | |||
| − | |||
| − | |||
| − | |||
| − | |||
| − | |||
| − | |||
| − | |||
If you are using a mac, follow the instructions [[Accessing_Linux_From_OSX|here]] instead of this page. | If you are using a mac, follow the instructions [[Accessing_Linux_From_OSX|here]] instead of this page. | ||
Latest revision as of 03:56, 26 July 2009
Please use the much simpler method at Accessing Linux instead.
If you are using a mac, follow the instructions here instead of this page.
Procedure:
This procedure works as is with Windows XP or Vista, and can be made to work with Windows 7 by manually installing Novacom as described on the Novacom and Windows 7 page. Using an XP virtual machine (VMware or Windows 7's "XP mode") has been reported to work if you do not have a supported platform.
Estimated time: 30 minutes depending on experience - including Next Steps after obtaining access.
Preparation
- Download the webOS image.
- Change the file extension from .jar to .zip and then extract the archive.
- Run the driver installer from the extracted file by browsing to the folder webosdoctorp100ewwsprint/resources/ and running NovacomInstaller_x86.msi (for 32-bit Windows) or NovacomInstaller_x64.msi (for 64-bit Windows).
- Download Putty.exe from http://www.chiark.greenend.org.uk/~sgtatham/putty/download.html. Note that there is no installation, you're simply downloading an exe you will run. Note where you downloaded it.
- Download and install Python 2.6 from http://www.python.org/download. Make sure it's not a more recent or an older version - it must be 2.6.x!
- Install using all the default choices.
- Get a copy of the novaproxy.py script from http://github.com/asedeno/novaproxy/raw/master/novaproxy.py (Right click and Save the file where you are going to remember you put it).
The actual process
- Type in the Konami code on your Pre (upupdowndownleftrightleftrightbastart) to access the Developer Mode application. A blue developer icon will pop up on the Pre
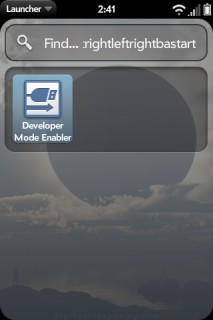
- Open the Developer Mode application on your Pre and enable the Developer Mode switch, resetting the device when prompted.
- Connect the Pre to your PC using a USB cable. Choose the option to "Just Charge". Windows should see a new device called Palm Novacom and automatically install the drivers for it. If you are asked to locate the drivers yourself, they are in C:\Program Files\Palm, Inc\novacom\x86 (for 32-bit Windows) or C:\Program Files\Palm, Inc\novacom\amd64 (for 64-bit Windows).
- If you installed Python with all the default choices, you can simply double-click the novaproxy.py file to start Novaproxy. Otherwise, bring up a command prompt window, cd to the location in which you extracted the zip file, then type python novaproxy.py to run the script.
- The script will execute and provide further instructions. If it tells you it's listening on a localhost port (usually 8023), everything is working. Be sure not to close this window.
- If the script does not work, or tells you there is a problem and the provided instructions don't help, join our IRC channel (irc.freenode.net #webos-internals) and feel free to ask for help.
- Run putty.exe
- In PuTTY's Host Name box, type localhost and select a connection type of RAW. In the Port box, type the port that Novaproxy says it's listening on (usually 8023).
- Click on Terminal in the treeview on the left, and under Line discipline options, set both Local echo and Local line editing to Force off.
- If you want to save these settings so you don't have to set them again later, click on Session in the left treeview, enter a name for your saved connection (such as "MyPre") in the Saved Sessions box, and click the Save button. The next time you want to connect, start Novaproxy, then launch PuTTY and double-click the saved connection.
- Click the big Open button. Novaproxy should indicate it is connecting, and PuTTY should show a root prompt that looks like this:

root@castle:/#
Congrats, you are now in as root. Tread lightly.
Now please visit the Next steps after obtaining Linux Access page to see what you can do.
Orr type exit at the root prompt to disconnect. PuTTY and Novaproxy will both exit automatically.
Credits:
Credit goes to asedeno for the novaproxy script.